Save
Save There's something about baking a sheet cake that feels like you're in on a secret—especially when you're making it for people about to walk across a stage and change their lives. My neighbor knocked on my door that May afternoon with flour still in her hair, asking if I'd ever made a vanilla cake big enough for twenty-four people, and honestly, I hadn't thought about it until she needed one by Saturday. What started as a favor turned into the most satisfying four hours in my kitchen, and watching that golden cake cool while I whipped butter and sugar into clouds of frosting reminded me why celebration desserts matter so much more than everyday ones.
I'll never forget frosting that cake while my neighbor's daughter sat at my kitchen island, talking about her college plans and laughing at how nervous she felt about leaving home. By the time we piped on the decorations and sprinkled those tiny mortarboards across the top, the cake had become less about dessert and more about marking a moment—the kind of moment that tastes better when someone stood next to you while you made it.
Ingredients
- All-purpose flour (3 cups): The backbone of a tender crumb; measuring by weight rather than scooping prevents that dense, dry cake nobody wants at a party.
- Baking powder (2½ tsp) and baking soda (½ tsp): This combination creates height and lightness without any bitter aftertaste that single leaveners sometimes leave behind.
- Salt (½ tsp): A pinch that sounds tiny but actually wakes up all the vanilla notes so they don't taste muted.
- Unsalted butter (1 cup), room temperature: Cold butter refuses to incorporate smoothly, so pull yours out of the fridge thirty minutes before you start—this patience pays off in texture.
- Granulated sugar (2 cups): The creaming stage is where magic happens; three minutes of beating air into butter and sugar creates the structure that makes this cake pillowy.
- Large eggs (4), room temperature: Cold eggs won't emulsify properly with the butter mixture, so set them out alongside the butter.
- Vanilla extract (1 tbsp): Use real vanilla if your budget allows; it transforms this from standard to something people ask you to make again.
- Whole milk (1½ cups), room temperature: The alternating dry-wet-dry method keeps the batter from becoming overworked, which is how cakes turn tough.
- Powdered sugar (4 cups), sifted: Sifting removes lumps that never fully dissolve, creating silky frosting instead of grainy frosting.
- Vanilla extract (2 tsp for frosting): This second measure of vanilla goes into the buttercream, deepening the flavor even more.
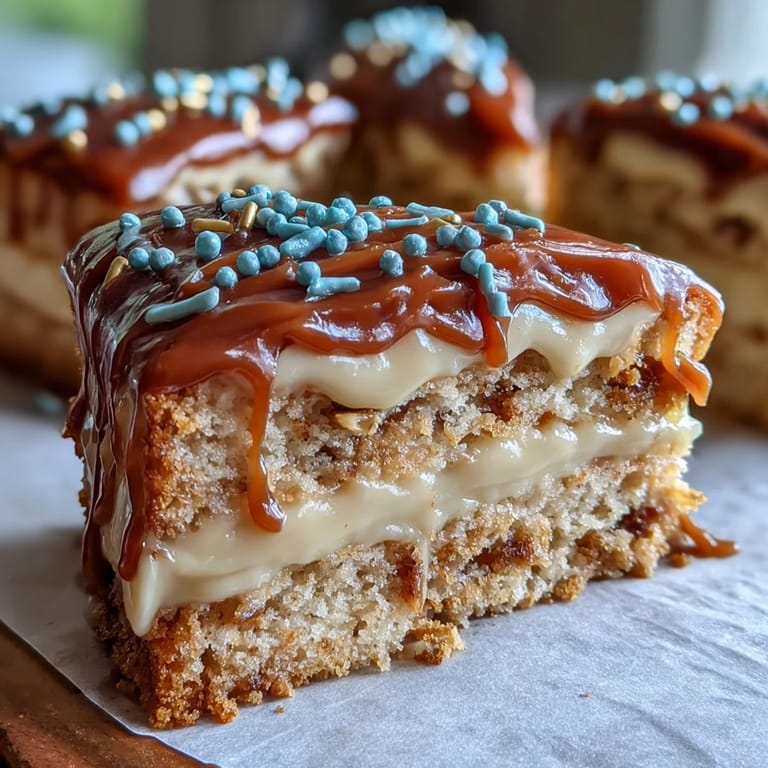
- Graduation sprinkles or edible decorations: These are your chance to make it festive without any real effort—school colors, mortarboards, whatever makes the moment feel official.
Tired of Takeout? 🥡
Get 10 meals you can make faster than delivery arrives. Seriously.
One email. No spam. Unsubscribe anytime.
Instructions
- Prepare your pan and preheat:
- Set your oven to 350°F and line that sheet pan with parchment paper so nothing sticks to the sides; greasing underneath the parchment keeps it from sliding around while you pour the batter.
- Mix your dry team:
- Whisk flour, baking powder, baking soda, and salt together in a bowl; setting it aside now means you won't scramble later when you're juggling wet ingredients.
- Cream butter and sugar until clouds form:
- This three-minute step is non-negotiable—you're literally whipping air into the mixture, which is what makes the cake rise and feel light instead of dense. Stop when it looks pale and fluffy, like you could almost imagine frosting with it.
- Add eggs one at a time, patient and gentle:
- Each egg needs a moment to fully incorporate before the next one arrives; rushing this step can cause the batter to break or separate, undoing all that beautiful creaming work.
- Mix in vanilla extract:
- One tablespoon goes in here, and you'll immediately smell why this cake is worth making.
- Alternate dry and wet ingredients like a dance:
- Half the flour mixture goes in on low speed, then half the milk, then the rest of each—this three-step pattern prevents overmixing, which would develop gluten and toughen the cake. Mix just until you see no streaks of flour; overmixing is the enemy here.
- Spread batter evenly into the prepared pan:
- A spatula works better than a spoon for this; you want an even layer so every slice bakes to the same level of golden-done.
- Bake until a toothpick tells you it's ready:
- Twenty-eight to thirty-two minutes should do it—the toothpick inserted in the center should come out clean or with just a crumb or two. The edges might pull slightly from the pan sides, which is your other visual cue.
- Let it cool completely in the pan:
- Patience here prevents a collapsed, crumbly disaster; move the pan to a wire rack and walk away for at least two hours, or until the pan feels cool to the touch.
- Beat butter until creamy for the frosting:
- Two minutes of beating gets it soft and fluffy enough to accept powdered sugar without lumps; this foundation matters more than you'd think.
- Gradually add powdered sugar on low speed:
- Dump it all in at once and you'll have a cloud of sugar dust everywhere; slow addition prevents that and keeps the mixture smooth.
- Add vanilla, milk, and salt:
- These final ingredients adjust the texture and deepen the flavor; the milk makes it spreadable while the salt brings everything into focus.
- Beat on high until fluffy:
- Two to three minutes here creates that light, almost mousse-like texture that spreads like a dream and tastes like eating clouds.
- Add food coloring if you're celebrating school colors:
- Gel food coloring works better than liquid; it won't thin out your frosting the way drops would.
- Spread frosting evenly over the cooled cake:
- An offset spatula makes this easier than a regular knife, but honestly, any flat tool works; the frosting is forgiving.
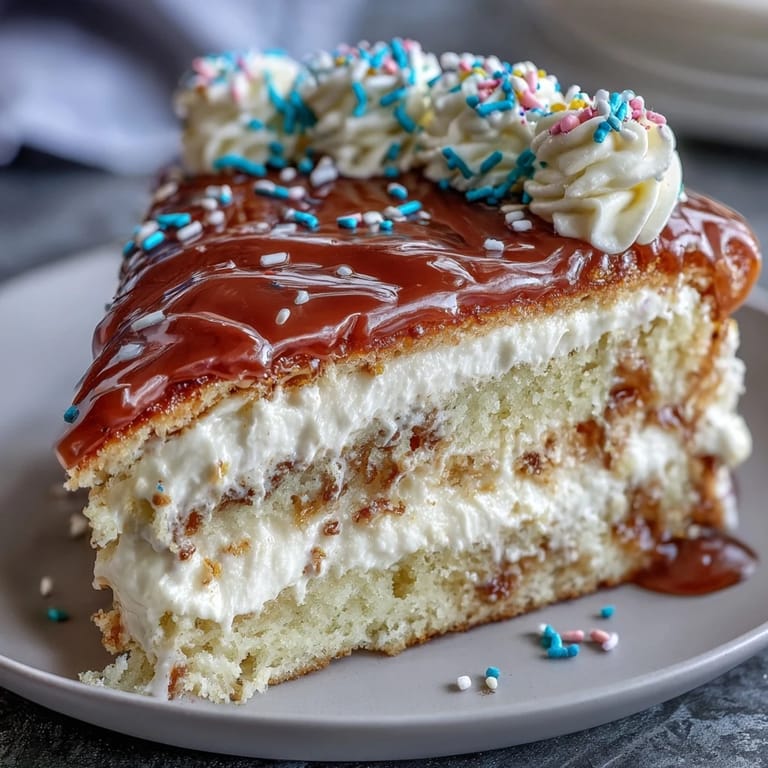
- Decorate with celebration in mind:
- Sprinkle your graduation-themed decorations over the top while the frosting is still soft enough to accept them; you can always add a border or piped messages if you're feeling fancy.
- Slice and serve with pride:
- Each piece should be tall, tender, and covered in that cloud of frosting—the payoff for all that careful mixing.
 Save
Save Standing in my kitchen that Saturday evening, watching my neighbor photograph that frosted cake with her daughter's face pressed against her arm in joy, I understood why people make sheet cakes for celebrations. This cake carried the weight of an entire milestone, and somehow, vanilla and butter and sugar managed to taste like exactly what the moment needed.
Why Sheet Cakes Win at Celebrations
Sheet cakes solve the math problem that haunts every home baker: how do you feed this many people without building a structural engineering project in your kitchen? One pan, no stacking, no layer anxiety—just a wide, generous canvas that feeds crowds and still tastes like you cared. The flat surface also makes frosting and decorating almost foolproof; there are no angles to navigate or frosting techniques that require years of practice. Plus, leftovers don't require any special storage containers or clever arrangements; just cover it and it keeps.
The Vanilla Magic
Vanilla gets dismissed as boring all the time, but that's only because most people encounter the artificial version and assume that's all vanilla has to offer. Real vanilla extract costs more, yes, but one tablespoon in the batter and another in the frosting creates a flavor that tastes sophisticated without trying—like someone whispered something kind while you were mixing. I've learned that vanilla is actually the background that lets everything else shine; it's not about bold flavor but about depth that makes people eat another slice wondering what they're tasting.
Making It Yours
The beauty of a sheet cake is that it welcomes additions without complaint—almond extract, lemon zest, a touch of cinnamon, whatever feels right for the person you're celebrating. Some people frost it simply and let the vanilla speak; others cover every inch with piped borders and decorative writing. The structure stays solid either way, which means you can play with decoration confidence.
- Add ½ teaspoon almond extract to the batter for a subtle depth that tastes like a secret ingredient.
- Frost it the day after baking when the crumb has fully set and won't pull up while you spread.
- Keep the frosting at room temperature while decorating; cold frosting tears the cake, but warm frosting is impossible to control.
 Save
Save This cake exists for those moments when vanilla and butter and the simple act of baking together mean more than any fancy technique ever could. Make it, frost it, watch it disappear, and know you've done something that mattered.
Recipe Q&A
- → What is the best way to achieve a fluffy texture?
Beating the butter and sugar until light and fluffy incorporates air, which helps create a tender crumb in the cake.
- → Can I make the frosting ahead of time?
Yes, the buttercream can be prepared in advance and stored covered at room temperature or refrigerated. Bring to room temperature before spreading.
- → How do I avoid a dense cake?
Mix dry and wet ingredients gently and avoid over-mixing. Use room temperature ingredients for even batter consistency.
- → What decorations work best for festive occasions?
Graduation-themed sprinkles, edible decorations, and food coloring matching school colors add a festive look to the cake.
- → Is it possible to adapt this for gluten-free diets?
Yes, substitute all-purpose flour with a 1:1 gluten-free baking blend to make the cake gluten-free without compromising texture.